Flashing Generic Tuya IR Blasters with ESPHome
Recently I had a need for a cheap IR Blaster for Home Assistant climate integration that doesn’t require a cloud to work. After a lengthy google search I found others were able to use a generic round Tuya IR blaster by reflashing them with ESPHome which suites my need. So I decided to get one for Php 390 in one of ecommerce site in my place. This one has a esp8266 chip.
One advantage on going this route instead of creating your own one lets say base on a wemos d1 is that you already have a nice case w/ a superb IR filtering plus a bunch of LED array complete with supporting circuitry so you can focus on high level integration stuff.
Tools needed.
- USB to 3.3V Serial adapter
- 5 pcs test leads with needle tip
- 3rd hand(s) for holding the test leads
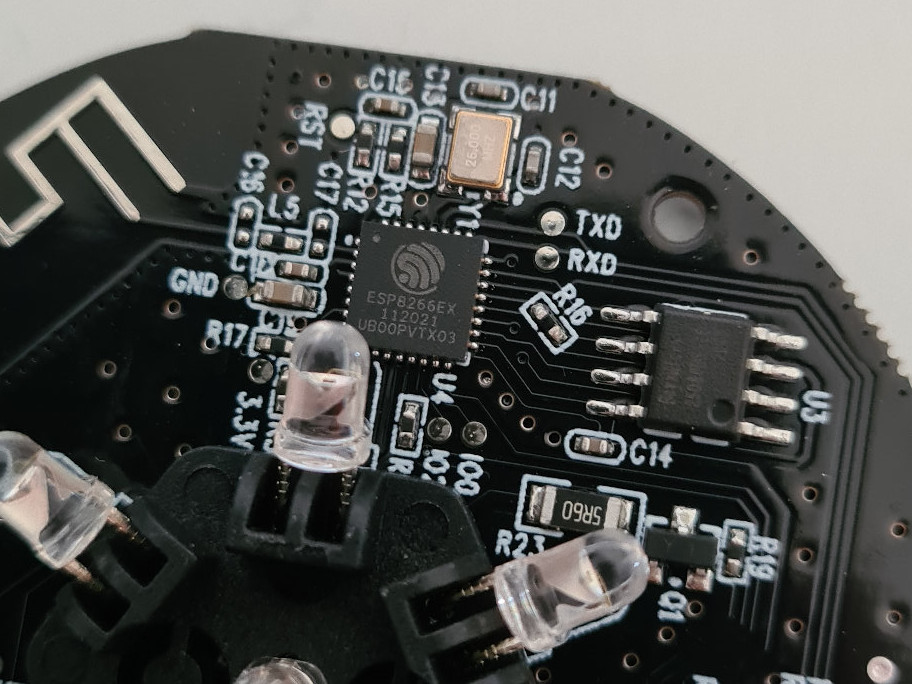
To reflash the ESP chip you need to find the ff pads/pins in the IR blaster.
- TX
- RX
- GND
- 3.3V
- GPIO0
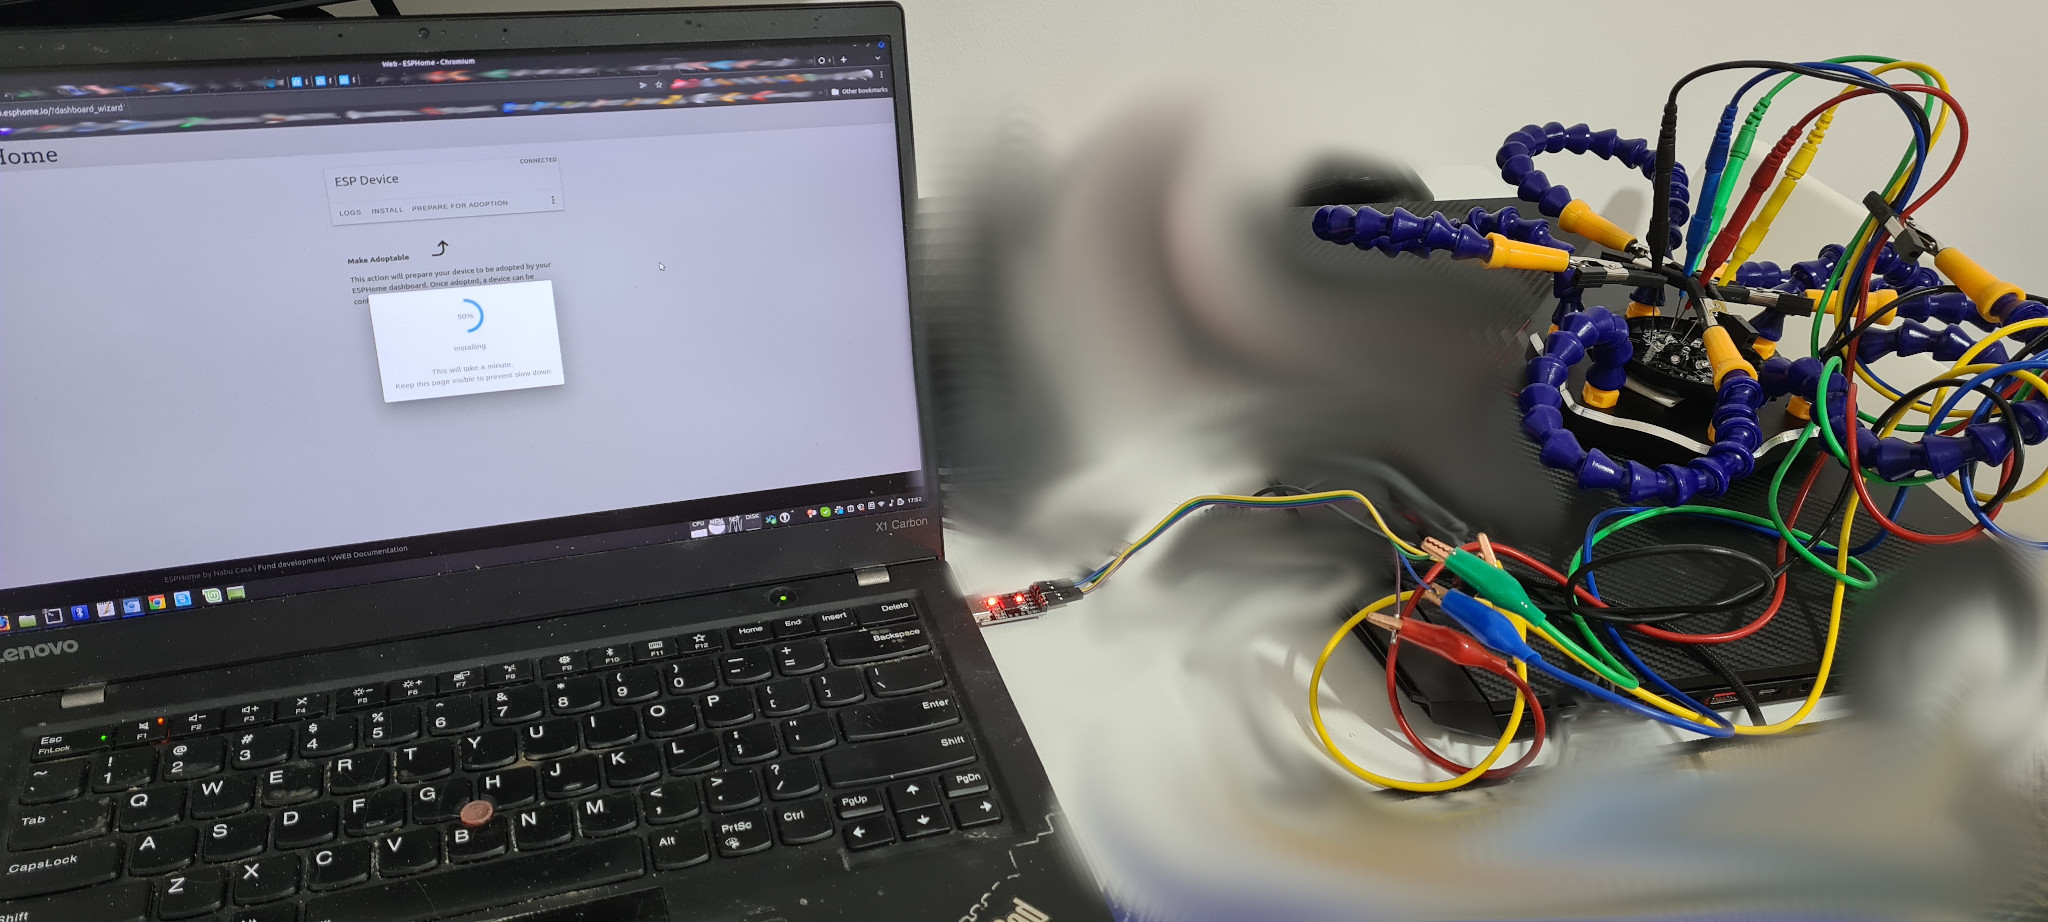
Wiring usb-to-serial adapter.
Flashing with ESPHome Web.
- Plug your usb-to-serial adapter to your PC/laptop. It would show up as port /dev/ttyUSB#
- visit https://web.esphome.io/?dashboard_wizard using Google Chrome or Chromium browser
- Press Connect and select your usb-to-serial adapter port.
- Press “Prepare For Adoption”. This would take several minutes to finish.
- Once flashing is done, unplug the usb-to-serial adapter and disconnect GPIO0 from GND.
Configure ESPHome wifi
- Plug your usb-to-serial adapter back your PC/laptop to power up the IR blaster.
- Wait for 10 seconds for ESPhome to boot up. Esphome will create a wifi AP with a captive portal.
- From your PC/laptop scan your wifi for SSID ‘esphome-web-######’. Connect to that SSID.
- Visit http://192.168.4.1 to configure ESPHome to connect to your IOT specific wifi network for security, as they say it’s the S in IOT.
- At this point your ESPHome IR blaster is will be discoverable in ESPHome Dashboard or from Home Assistant.


No comment
Say something
Thank you
Your post has been submitted and will be published once it has been approved.
OK
OOPS!
Your post has not been submitted. Please return to the page and try again. Thank You!
If this error persists, please open an issue by clicking here.
OK